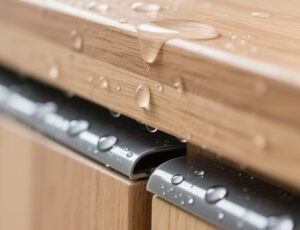

I see the pain: panels look great, but the edges fail the eye. I will show a clear path to match edges to top Latin American boards.
Matching edge banding means color, texture, gloss, and durability that designers accept. I give you steps, tools, and real checks to win big orders.
This article walks you through what the big board brands use, common matching problems, proven measurement and testing methods, how digital printing helps, and how to build long-term supply ties with furniture brands. Read on and use my checklist.
Understanding the Color and Texture Standards of Latin America’s Leading Board Brands?
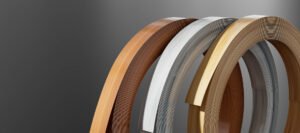
Boards from Arauco, Duratex and Masisa come with defined collections and textures. They publish palettes and texture names. Suppliers must know these specs before matching edges.
Arauco lists named textures and tones for MDF and particleboard. Masisa updates seasonal color lines and melamine textures. Duratex also publishes texture collections and technical catalogs. These makers design for durability and specific surface feels. Knowing their standard names and textures speeds matching and avoids guesswork.

Dive deeper — reading brand specs, sample practice, and a quick lookup table
I always start with the brand spec sheet. I download the panel tech sheet or request the exact SKU from the buyer. The sheet shows texture name, gloss level, and substrate type. For example, Arauco lists standard textures like “Suede” and named woods in their product pages. Masisa publishes new color collections and melamine properties. Duratex provides catalog and texture notes for designers. Use those details as the baseline for your edge selection.
Get a physical panel sample. Digital photos are useful. Physical samples are mandatory. I never match from a photo alone. I ask clients to send a 150×150 mm panel piece. I compare that panel under local light and my shop light.
Read these fields on the spec:
- Texture name (e.g., Suede, Velvet).
- Surface finish (matte, satin, high gloss).
- Substrate type (MDF, particleboard, melamine).
- Special coatings (anti-scratch, antimicrobial).
Use this lookup table as a quick guide.
| Brand | Common textures | Typical finish | Action for edge match |
|---|---|---|---|
| Arauco | Suede, Velvet, Driftwood | Matte to satin | Request SKU, send matching wood-print edges |
| Masisa | New color lines (2025), melamine | Anti-scratch, matte | Test sample for texture registration |
| Duratex | Multiple texture collections | Durable melamine finishes | Use printed + embossed edges to match |
I keep a digital folder for each brand with sample photos, common SKU notes, and gloss targets. That folder saves time on the next order. It also shows buyers I know their panels.
Common Challenges in Matching Edge Banding with Local Board Collections?
Matching fails for a few repeat reasons: color drift between batches, texture mismatch, gloss difference, and environmental performance. I meet these problems in real jobs.
Color can change by small amounts between panel lots. Texture embossing can make a printed edge look flat. Gloss mismatch makes even a good color look wrong. Humidity can make edges peel or warp after install. I always expect these issues and build checks to catch them before shipment.
Dive deeper — root causes, detection steps, and mitigation table
I break the challenges into root causes and actions. Here is how I diagnose and fix them.
1) Color drift and batch variance
Root cause: Panel face and edge produced in different factories or at different times. Even same SKU can vary.
Action: Always request the actual production batch code or a physical sample. Use ΔE measurement to confirm match before full runs.
2) Texture and emboss registration
Root cause: Panel has an embossed texture. A flat printed edge will not reflect light the same way.
Action: Use textured or embossed edge tape or veneer that follows the panel texture. For deep textures, consider veneer or textured PVC.
3) Gloss and sheen mismatch
Root cause: Different gloss level between face and edge. Light highlights show mismatch even if color is close.
Action: Measure gloss units and set a target. Adjust edge coating or finish to match within 5 gloss units for premium work.
4) Environmental failure (peel, swell)
Root cause: Inadequate adhesive or wrong edge material for humid climates.
Action: Use humidity cycling in tests and prefer moisture-resistant adhesives (PUR) and stable materials (PP/ABS for some cases).
Use this table to guide action:
| Problem | How I detect it | Corrective step |
|---|---|---|
| Color drift | ΔE test on sample | Reprofile print or request panel re-batch |
| Texture mismatch | Visual + tactile test | Use embossed edge or veneer |
| Gloss mismatch | Gloss meter reading | Adjust edge finish or topcoat |
| Delamination | Humidity soak test | Change adhesive to PUR, review storage |
I make the buyer sign off on a sample pack with test results. That reduces revision cycles. I also keep a log of batch numbers and test files. This log becomes proof if there is a dispute later.
Proven Methods for Accurate Color, Gloss, and Texture Matching?
Accuracy comes from tools and process. I use colorimeters, gloss meters, and a strict sample approval workflow. I set ΔE targets and measure gloss at 60°. I record results and only proceed when the buyer signs off.
For color, ΔE ≤ 2–3 is a good target for high-end work. For gloss, within 5 gloss units usually works. For texture, I match emboss patterns or use wood-printed veneer. I document all results and attach them to sample packs. REHAU and other suppliers publish tight ΔE claims as an example of practice.

Dive deeper — step-by-step matching protocol and measurement table
I follow this protocol for every design-match job.
Step 1: Intake and spec setting
- Get physical panel sample and SKU.
- Record environment (coastal, inland, humidity).
- Set targets: color ΔE, gloss units, texture depth.
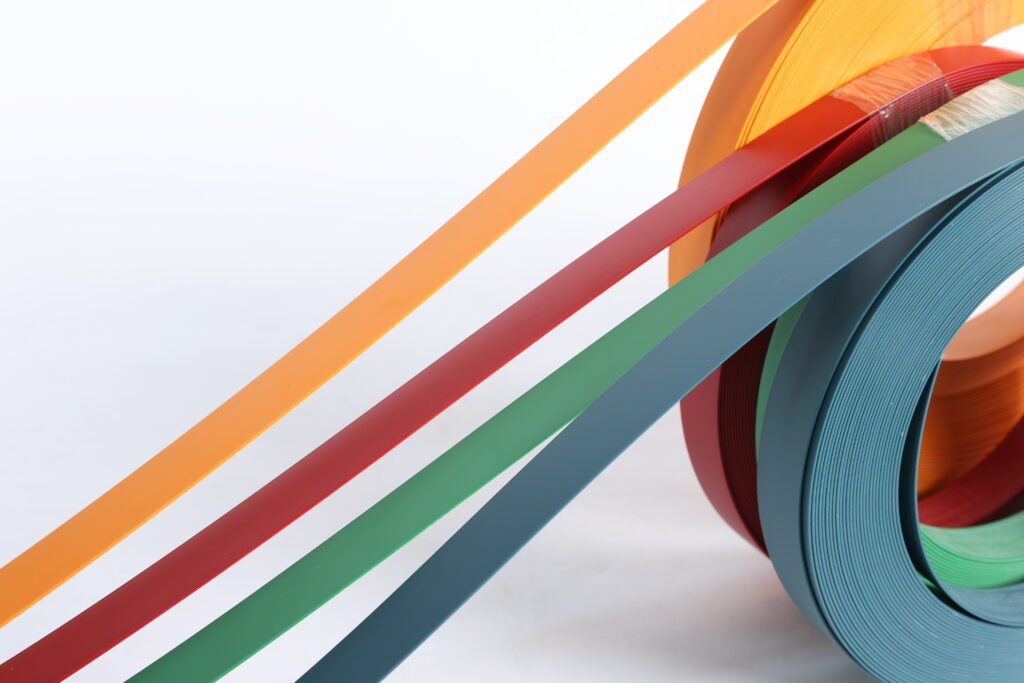
Step 2: Select candidate edge materials
- Choose between printed PVC, veneer, ABS/PP, or metal-look options.
- Consider adhesive pairing for the substrate.
Step 3: Produce and test samples
- Print or cut 3–6 candidate samples.
- Measure ΔE with a spectrophotometer.
- Measure gloss at 60°.
- Run a 48-hour humidity soak and basic peel test.
Step 4: Buyer approval
- Send sample pack with photos, ΔE, gloss, and humidity test data.
- Get sign-off with batch number and lead time.
Step 5: Pilot run
- Produce a small pilot (100–200 m).
- Run QA tests and ship pilot.
- Start full production only after pilot pass.
Measurement table example:
| Metric | Tool | Target |
|---|---|---|
| Color (ΔE) | Spectrophotometer | ≤ 2–3 (premium) |
| Gloss (60°) | Gloss meter | Within 5 GU |
| Humidity resistance | 48h soak + peel | No delam, <2mm lift |
| Texture registration | Visual + tactile | Align pattern within 2 mm |
This protocol gives buyers confidence. It also saves time dealing with returns.
How Digital Printing and Custom Production Improve Matching Efficiency?
Digital UV inkjet printing on edge tape lets me print exact grain, veins, and custom motifs. It cuts lead time for small runs and it reduces color mismatch disputes. Agfa and other inkjet systems support single-pass printing for edge tape, making production faster and durable. Digital also supports short runs for designers and fast sample turnarounds.
Dive deeper — digital workflow, benefits, and cost considerations
Why digital helps
Digital printing lets me match grain direction and specific knots. I can print a 2-meter sample to show the exact look. That beats generic stock colors. Digital printing also allows on-demand production. Designers often want 50–300 m runs. Digital makes those runs viable.
Digital workflow I use
- Accept panel sample or high-res scan.
- Create color profile in RIP software.
- Print test strip on edge tape.
- Emboss if needed to match texture.
- Test ΔE, gloss, and humidity.
- Send sample pack for approval.
Benefits
- Faster sample approval.
- Lower MOQ for custom jobs.
- Better visual match for complex grains or stone looks.
Cost and ROI
Digital setup has higher per-meter cost than generic stock. But it saves rework and speeds approvals. For custom jobs and premium clients, I recover cost in the first order. For volume orders, digital can be hybrid with roll stock for cost balance. Agfa notes single-pass UV inkjet as robust for furniture edge applications.
I also partner with local print houses when I lack in-house capacity. That keeps my lead times short and quality high. I always include test data with digital samples to prove the match.
Building Long-Term Collaboration Between Edge Banding Suppliers and Furniture Brands?
Long-term ties need data, speed, and trust. I offer shared color libraries, batch tracking, and regular palette updates. I also provide training and quick-response sample packs for designers. That turns one-off orders into recurring business.
A formal collaboration line includes annual color sync, sample exchange, and a pilot approval process. Brands see this as supply security. Suppliers win steady orders. I built this model and it reduced approval time by weeks for my clients.

Dive deeper — partnership model, templates, and metrics to track
Partnership components I offer
- Shared color and texture database. I store approved profiles for each brand SKU.
- Annual sync meeting. I review new board collections and update edge palettes.
- Sample-on-demand service. I keep small stock in target markets for 24–72 hour sample shipping.
- QA and batch traceability. I log coil numbers, adhesive lots, and test results.
Templates to use
- Sample intake form (SKU, environment, ΔE target).
- Sample test report (ΔE, gloss, humidity).
- Pilot batch QA certificate (batch numbers, test results).
- Annual palette update sheet.
Metrics I track with partners
- Sample approval time (days).
- Pilot pass rate (%).
- Return rate after delivery (%).
- Lead time for repeat orders (days).
How this model helps brands
Brands get faster approvals, fewer surprises, and a clear quality trail. They also get faster market response when they roll out new collections. Suppliers gain stable volume and better margins.
I recommend starting with a pilot partner and proving the model for one year. If it works, scale to other brand partners.
Conclusion
Follow a clear spec-first process: get panel samples, set ΔE and gloss targets, use digital print for complex matches, test for humidity, and offer shared palettes and fast samples. Do this and you win Latin American brand business.
Data sources and links
- ARAUCO product pages and texture collections. (ARAUCO – Renewables for a Better Life)
https://na.arauco.com/en/p/wf220-brazilian-walnut-WF220 - Masisa melamine and color collections (2025 updates). (Masisa)
https://www.masisa.com/en-us/campana-sentir/masisa-colors - Duratex catalogs and texture information. (Duratex)
https://duratex.com.co/ - Agfa — printing furniture edge bands with UV inkjet (digital printing use cases). (Agfa)
https://www.agfa.com/printing/news/printing-furniture-edge-bands-uv-inkjet/ - Thermal and hydrothermal stability study of hot-melt adhesives used for edge banding (EVA vs. others). (ResearchGate)
https://www.researchgate.net/publication/329988380_Thermal_and_Hydrothermal_Stability_of_Hot-Melt_Adhesive_Compounds_Used_to_Adhere_Plastic_Edge_Banding_Materials_to_Particleboards