
I used to buy the thickest edgeband I could find. I thought thicker meant better. That cost me money and caused fit and finishing problems.
Thickness is one factor. It does not solve every durability or processing issue. Know how thickness interacts with material, process, and end use.
I will walk through the common myths I see. I will show where they help and where they hurt. I give practical checks you can use when you buy for different markets. I add shop-floor examples I learned from.
Is Thicker Edgeband Always Better for Durability and Quality?
I once believed thickness equals strength. I was wrong. Thickness can add protection. It can also make bending, trimming, and appearance worse.
Thicker edgeband gives more impact resistance in some uses. It does not guarantee better wear, scratch resistance, or visual match.

Dive deeper: when thickness helps and when it does not
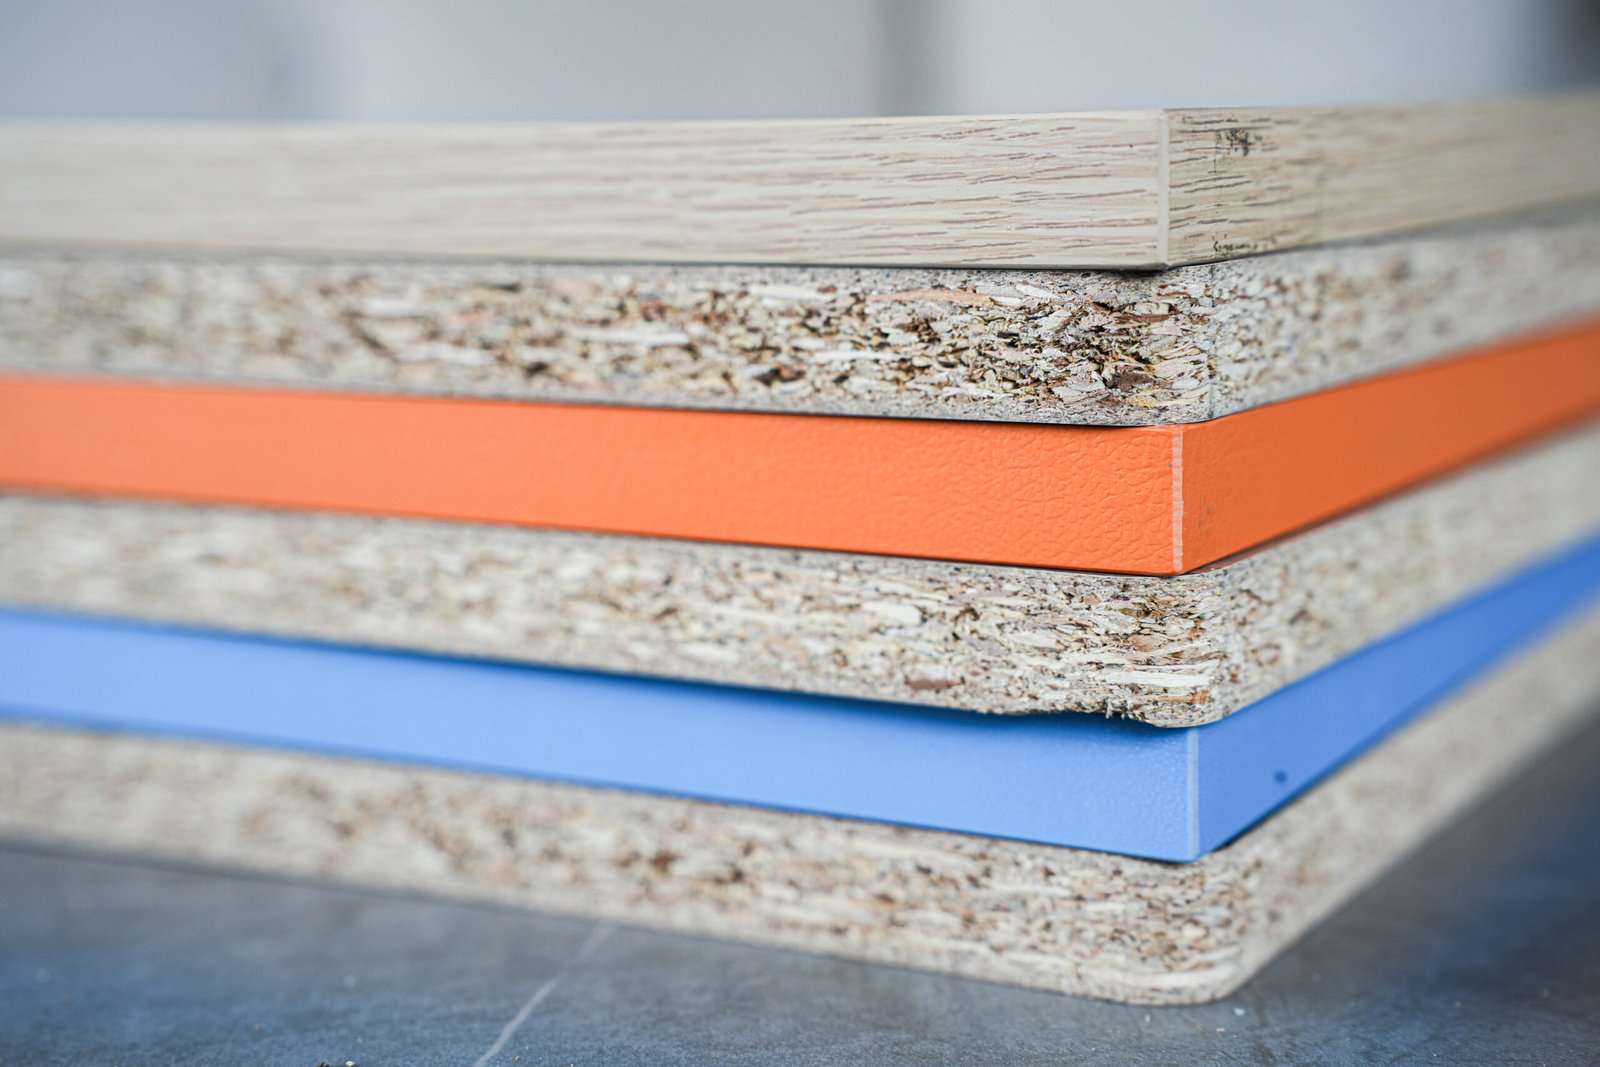
Thicker tape gives more plastic between the panel edge and the outer surface. That extra material absorbs knocks better. For heavy-use furniture, like countertops or lockers, 1.5–2.0 mm or thicker can reduce visible dents. I use thick edgeband for worktops and commercial furniture. Manufacturers and suppliers list ranges from 0.3 mm up to 3.5 mm. Typical stock sizes are 0.4 mm, 0.8 mm and 2 mm. Suppliers note thicker rolls have shorter roll length and different handling needs.
But thickness alone does not control scratch resistance or color stability. Those traits come from topcoats, additives, and base material quality. A thin edgeband with a hardcoat can outperform a thicker one without a hardcoat in scratch tests. I always ask for abrasion or Taber test numbers, not just thickness. Taber cycles tell me how the surface holds up under repeated wear. I also look at chemical resistance data for cleaners and solvents. That data matters for hospitality and kitchen customers.
Processing is another limit. Thick edgeband needs more glue and more pressure to form. It may need different trimming tools. I once ran a batch of 2 mm edgeband on a line set for 0.8 mm. The trim cutters chattered and the finish had micro-chips. That cost time and money to fix. Suppliers like REHAU publish processing notes that show different recommended settings by thickness. I follow those guidelines.
In short, thickness helps in specific cases. It is not a universal fix. Match thickness to use-case, surface treatment, and your production capabilities.
Does Edgeband Thickness Directly Determine Impact and Wear Resistance?
I have heard sellers claim thicker always resists impact better. That is partly true. Impact and wear are different tests. Thickness affects impact more than wear.
Impact resistance often improves with thickness. Wear and abrasion depend mostly on surface finish and material formulation.
Dive deeper: the mechanics of impact vs abrasion and what to test (min 200 words)
Impact resistance is about how a material absorbs a sudden force. Thicker edgeband gives a larger cross-section. That extra material spreads the force. For a blunt strike, a thicker edge will often dent less. That is why many factories use 2 mm or 3 mm edgeband on heavy-duty worktops or reception counters. The thickness also helps hide small errors in trimming and profiling because there is more material to shape. Suppliers list thicker edgeband for heavy-duty applications and often note shorter roll lengths and different processing needs.
Abrasion and wear are different. These depend on surface hardness, coatings, and the polymer mix. A thin edgeband with a hard, scratch-resistant topcoat can last longer under rubbing than a thicker one without a hardcoat. Lab tests like the Taber abrasion show how many cycles a surface tolerates before gloss loss or weight loss. I require Taber data when I buy for retail furniture. If a supplier only gives thickness, I ask for abrasion cycles and UV retention numbers. That tells me how the edge will age.
Also consider edges that face repeated small impacts versus rare big hits. For many residential cabinets, daily wear is mostly abrasion from contact and cleaning. In that case, prioritize coating and abrasion resistance. For commercial or public furniture, choose thicker edgeband combined with robust surface chemistry. Both factors together yield the best results.
How Thickness Affects Edge Bending, Radius Finishing, and Processing Limits
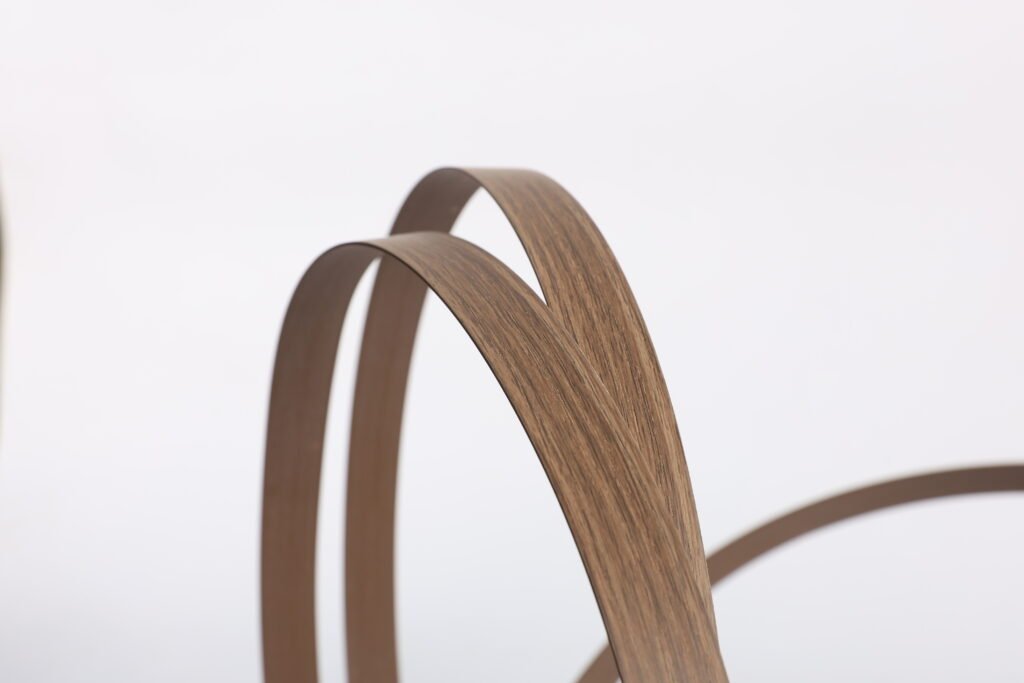
I have seen operators struggle to bend thick edgeband around tight radii. Thickness changes bendability. It also changes machine settings and cycle time.
Thinner edgeband bends easier. Thicker edgeband needs more heat, pressure, or special folding methods. Processing limits vary by machine and tape type.
Dive deeper: processing trade-offs and machine implications
Bending behavior relates to tape thickness and material flexibility. Thin PVC (0.4–0.8 mm) conforms to small radii with minimal heating. Many kitchen cabinetmakers prefer these for curved profiles and for fast production. Thicker tape (1.5–3 mm) resists folding and can crease or lift if forced around a sharp corner. REHAU and other suppliers warn that very glossy or laser-processed edges are more sensitive because the higher surface energy shows telegraphing from the substrate, especially for thicknesses below 1.5 mm in some zero-joint processes.
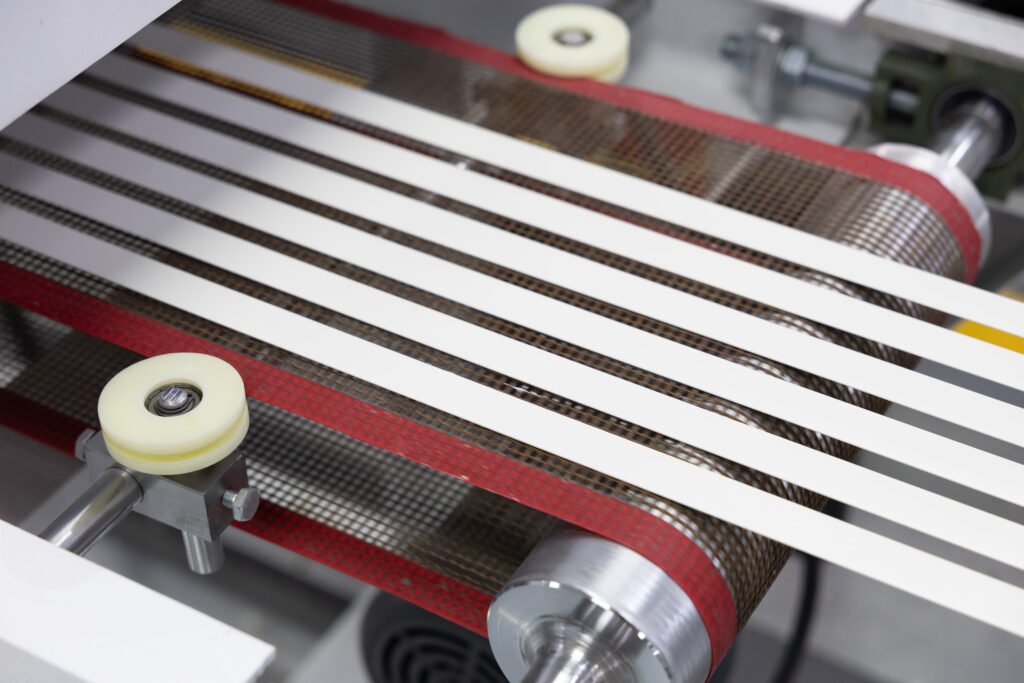
Processing equipment matters. Manual iron-and-roller methods handle many thicknesses but take more time for thick tape. Automated lines set for thin tape may not have the glue pot temperature, pressure, or trimming tool strength to handle thicker rolls. I have adjusted glue pot settings and roller pressure when switching thickness. I also changed cutters and slowed feed speed to avoid tearing. Suppliers publish recommended temperatures and pressures by thickness. Use those sheets. They save trials.
Tight radius finishing may require special techniques for thicker tape. Some shops use scoring on the inside face or make a tiny fold with a folding tool. Others choose a thinner wrapping grade for tight radii. For end users, a seamless look matters. If the edgeband telegraphs the core pattern or creases at corners, the product looks cheap. So I always test a sample panel with the exact radius, adhesive, and machine settings before a full run. This test avoids costly rework.
What Thickness Options Match Different Panel Types and Furniture Categories?
I categorize choices by panel thickness, use-case, and finish expectations. One size does not fit all.
Use thin (0.3–0.8 mm) for standard cabinets and tight radii. Use mid-thickness (0.8–1.5 mm) for visible trims. Use thick (1.5–3 mm) for impact zones and heavy-duty furniture.

Dive deeper: a practical thickness guide with a table and selection rules (min 200 words)
I use a simple table in my buying notes. It maps panel type and use to recommended thickness.
| Application | Typical panel | Recommended thickness | Why |
|---|---|---|---|
| Standard kitchen cabinets | 16–22 mm MDF/chipboard | 0.4–0.8 mm | Easy to form. Economical. Good for most edges. |
| Premium furniture visible trim | 18–25 mm veneered or laminate | 0.8–1.5 mm | Thicker profile, better look, hides small variance. |
| Worktops / heavy duty | 30–40 mm counters / bunk beds | 1.5–3 mm | Impact protection and service life. |
| Tight radii / curved panels | thin plywood or routed profiles | 0.3–0.8 mm (wrapping grade) | Better conformability and fewer creases. |
| External decorative trims | thin solid surfaces | 0.8–1.5 mm with hardcoat | Balance of look and durability. |
These are rules of thumb. I always check supplier datasheets for shrinkage numbers and processing temps. Some suppliers produce special wrapping grades that behave like thin tape even if slightly thicker. For laminated or laser edge processes, check the supplier guidance for the maximum recommended thickness. REHAU and others list specific thicknesses for zero-joint and laser processes. I match supplier guidance to my machine capability.
I also consider roll logistics. Thicker rolls have shorter lengths per roll. That increases changeover and packaging cost. It also affects MOQ and shipping. For large runs, thinner standard sizes can be more economical. For small high-end batches, thicker or special finishes may justify higher unit cost. I calculate total cost of ownership, not just price per meter. That saves money in the long run.
How to Choose the Right Thickness Without Wasting Cost or Sacrificing Performance?
I apply three checks: match to use-case, verify surface properties, and test on your line. These stop bad buys.
Decide by function, not by number. Check abrasion and UV test data. Run an in-house trial. Then pick the cheapest option that meets specs.

Dive deeper: an actionable buyer checklist and decision flow (min 200 words)
I use a short decision flow for every purchase.
- Define end use. Ask if the edge meets heavy impact, frequent cleaning, or visible aesthetic needs. If the answer is heavy impact, consider 1.5 mm or more. If the edge must wrap tight radii, start with 0.4 mm or a wrapping grade. This step guides most choices.
- Request technical data. Ask suppliers for Taber abrasion numbers, UV gloss retention, shrinkage at process temps, and SDS. Do not accept only thickness. If the supplier cannot provide those numbers, ask for samples. Trusted suppliers like REHAU publish recommended settings and test data. Use those as a baseline.
- Run a process trial. Use the exact panel, adhesive, and machine settings. Trim and finish a full piece. Check for telegraphing, lift, and surface damage. Measure abrasion and do a quick rub test. I keep a small sample bank from each lot for later claims. Trials catch machine-setting mismatches early.
- Calculate TCO. Include reject rates, changeover time, and buyer returns. Thicker tape may cost more but cut rework if it stops impacts. Conversely, thin tape with a hardcoat can save money and perform well in retail cabinets. I run a simple cost-per-successful-piece calculation. That shows real value.
- Set acceptance criteria. Define minimum Taber cycles, % gloss retention after UV, and max shrinkage. Make these part of the purchase contract for large orders. This avoids surprises and gives you leverage if a lot fails.
Finally, build supplier relationships. Favor vendors who give full data and who support processing. That saves tests and reduces risk. For premium lines, accept a small premium for proven performance. It protects your brand and margins.
Conclusion
Thickness matters, but not alone. Match thickness to use, check surface tests, and run real trials to avoid costly mistakes.
Data sources and links
- REHAU — Edgeband technical data sheet and processing tips. https://www.rehau.com/downloads/886866/edgeband-technical-data-sheet.pdf. (REHAU)
- REHAU — Edgeband product pages and application sizes. https://www.rehau.com/in-en/interiors-edges-edgebands. (REHAU)
- Technical Specifications PVC Edgebanding (supplier PDF). https://tece.com.tr/images/downloads/en/TDS_PVC.pdf. (TECE | The Edgebanding Company)
- Typical thickness ranges and supplier notes. https://www.edgingsuppliesltd.co.uk/pvc-edgebanding/. (Edging Supplies)
- BESTIN Group — Edge Banding Completed Guide (processing and selection guidance). https://www.bestingroup.com/edge-banding-completed-guide/. (最佳集团)
- Taber Abrasion testing guidance and reliability notes. https://www.azom.com/article.aspx?ArticleID=20667. (AZoM)
- Industry discussion on recommended thickness by application. https://www.anda-china.com/What-is-the-best-thickness-for-PVC-edge-banding-id43359376.html. (anda-china.com)
If you want, I can turn this into a one-page buyer checklist, an email template to request test data from suppliers, or a printable decision table for your purchasing team.