
You buy cheap edge banding and it fails later. The problem costs time and money. I list four common pits and how I avoid them.
Four main pits wreck procurement: chasing lowest price, ignoring color and tests, trusting unverified suppliers, and skipping contracts or inspections. I explain each pit and give practical checks and sample requests.
I know this market from buying and fixing bad batches. I saw small mistakes turn into big problems. I will keep this short and clear. Read each pit and use the checklists I give.
Why Edge Banding Procurement Often Goes Wrong?
You want low cost and fast delivery. That hope causes poor choices. I want you to avoid that trap.
Many buyers miss the full cost of poor quality. The edge banding market is large and fast growing, so offers come from many sources. I use market size and trend data to explain why this matters.

Dive deeper: root causes and what I check first
I see three root causes when procurement goes wrong. I list them. I then show actions I take for each cause.
Cause 1: Narrow focus on unit price. Buyers focus on cents per meter. They forget color, glue, and waste. I always calculate landed cost. I add rework, returns, and lost time.
Cause 2: Too many unknown suppliers. The market has factories and trading companies. Many listings look good online. I verify export records and ask for factory photos and previous client names.
Cause 3: Weak quality gate before mass production. Buyers accept photos and cheap samples. Mass production then fails. I require production samples and clear test methods.
My checks before I place any PO
| Check | What I ask | Why |
|---|---|---|
| Market context | Ask about factory capacity and export clients | To know if they can deliver volume |
| Sample type | Production sample, 200–500 mm | To see real finish and glue |
| Test spec | Peel, heat, abrasion methods named | To compare with lab results |
| Contract items | Sample ID, tolerance, penalties | To protect me when batch fails |
I rely on market reports to understand supplier claims. I know Asia-Pacific leads production. I use that when I pick suppliers and when I set expectations about MOQs and lead times.
Pit 1: Chasing the Lowest Price Leads to Hidden Costs?
You see a tiny price per meter and you feel lucky. That feeling hides many costs. I avoid this trap with a simple price checklist.
The cheapest quote often comes with weak raw material, poor glue, or no QC. I show how I break down real cost and test for value.
Dive deeper: real cost calculation and material trade-offs
I always think in total landed cost. I list what I include. I then show how material choice affects cost and risk.
What I include in landed cost
- Unit price from supplier.
- Shipping and insurance.
- Import duty and local handling.
- Sample and lab test fees.
- Cost of rework and scrap in worst case.
- Cost of delayed production.
When I add those, the lowest unit price often loses. I give an example. A supplier offers $0.02 per meter for PVC. I pay $200 shipping and $100 test fees. I also lose two production days if the batches fail. The cheap unit becomes expensive.
Material trade-offs
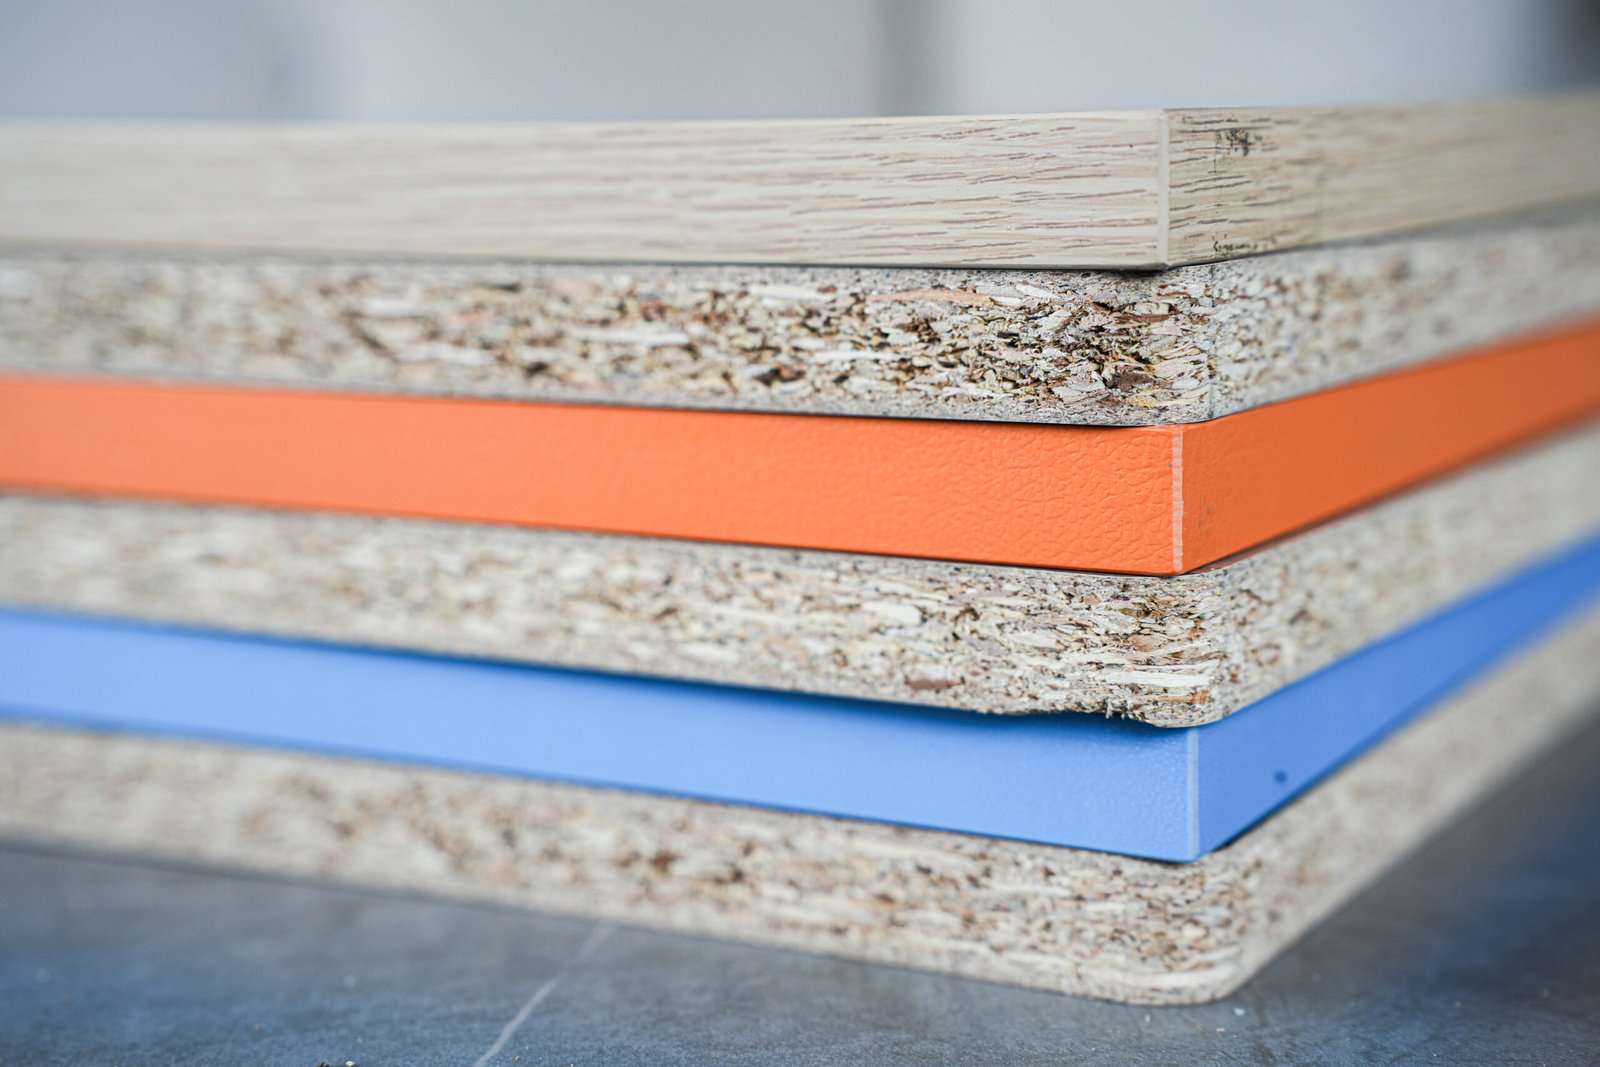
I compare PVC and ABS. PVC is common and cheap. ABS often trims better and gives fewer machine issues. I choose material by use case. I confirm the supplier’s exact grade and processing notes before I sign.
Table: hidden cost checklist I use
| Item | How I estimate | Action |
|---|---|---|
| Rework cost | % of batch that may fail | Ask supplier for defect rate history |
| Machine downtime | Hours lost for adjustments | Schedule trial run and spare parts |
| Test cost | Lab fees | Budget tests for large orders |
| Sample cost | Paid production sample | Require paid production sample |
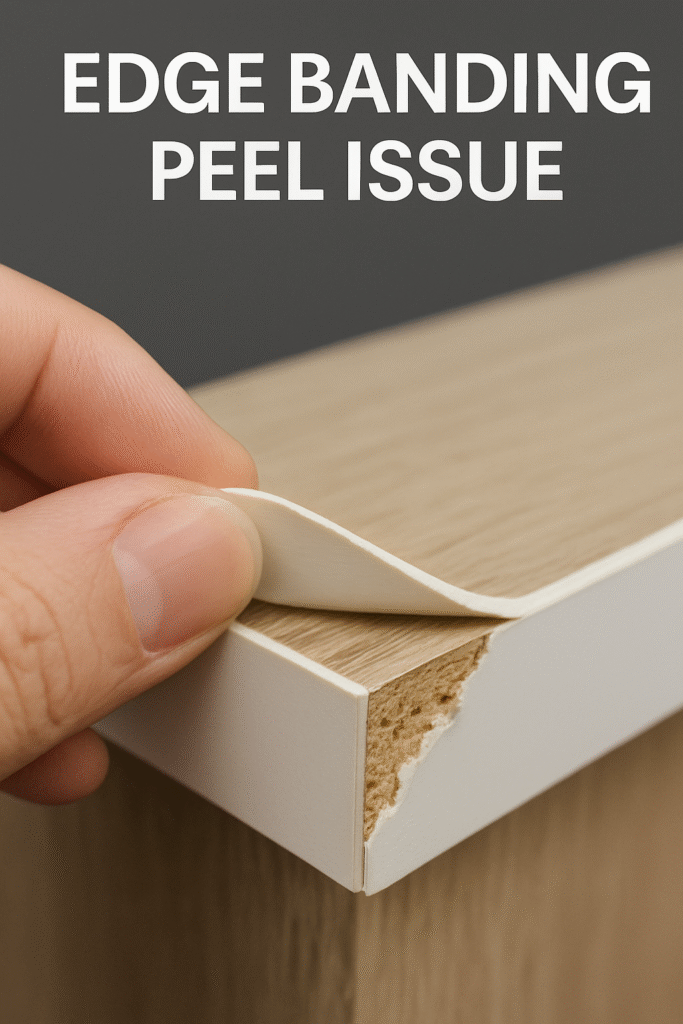
I learned this from a batch that peeled during assembly. I paid for rework and lost client trust. Since then I budget testing and include a defect clause in the contract. I recommend that you do the same.
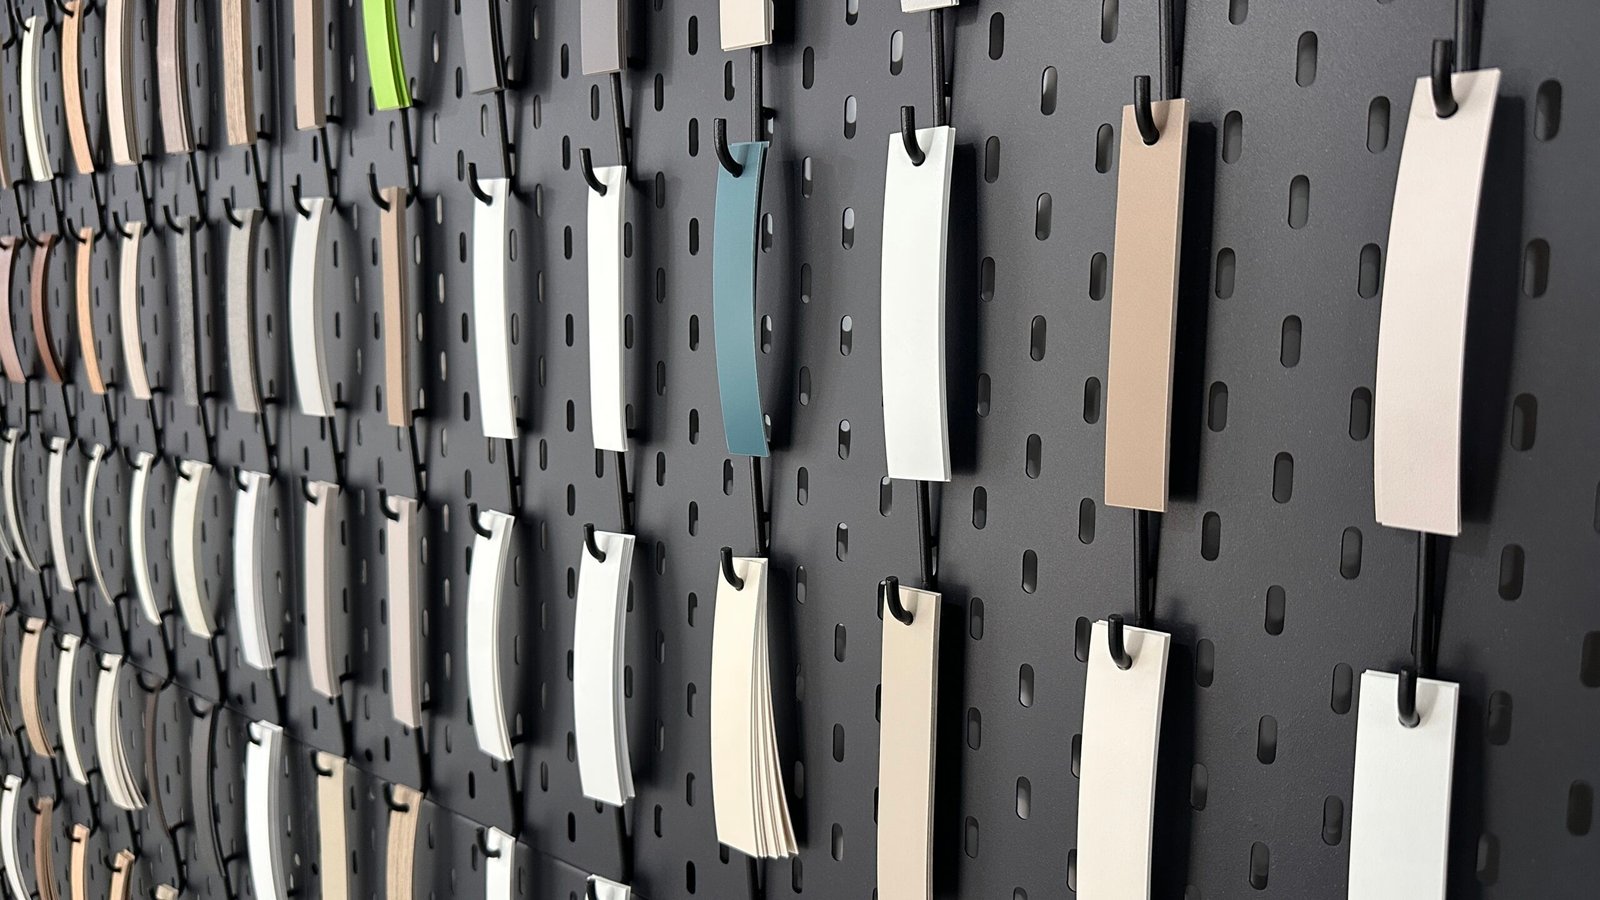
Pit 2: Ignoring Color Matching and Quality Testing?
You assume photos match color. That assumption will fail. I always demand real samples and test methods.
Color mismatch and weak adhesion are the top product issues. I use clear tests and tolerances to avoid them.

Dive deeper: tests I use and how I set acceptance criteria
I require both visual and instrument checks. I also require adhesive and heat tests. I name the standards and the lab work I expect.
Color matching
I send the exact board sample to the supplier. I ask for a production sample that we glue to the board. I measure color difference with ΔE when possible. I set an acceptance band. I also check patterns and gloss under natural and fluorescent light.
Adhesion and peel tests
I ask for peel strength tests. I name standards like ASTM D903 or ASTM D1876 as references. I ask for test results on the exact sample I approved. I do not accept generic lab reports. I send production samples to a third-party lab if I need stronger proof.
Heat and humidity tests
I ask for heat resistance numbers. I ask suppliers to report softening or delamination under set temperatures. I test glued strips in my shop with a heat gun and with hot water soak if needed.
Abrasion and finish tests
I check surface abrasion and gloss loss. I use a simple rub test for quick checks. I also ask labs for quantitative abrasion numbers for big orders.
Table: minimum tests I require for production orders
| Test | Why | My acceptance |
|---|---|---|
| ΔE color match | Visual consistency | ΔE within agreed range or visual pass |
| Peel strength | Adhesion reliability | Meet ASTM-based test on sample |
| Heat resistance | No bubbling or warp | No delam at agreed temp |
| Abrasion | Finish durability | No visible failure after rub test |
I follow these steps for every new color or finish. I also keep a test archive. I label each approved sample with batch ID. I reference that sample in the contract. This process cut my color disputes by more than half.
Pit 3: Trusting Unverified Suppliers Too Quickly?
You may talk happily with a sales rep and then trust them. Trust without verification costs you. I always verify before payment.
I verify company registration, export history, and ask for client references. I also get a factory video or inspection report. I prefer factories with traceable export records.

Dive deeper: verification steps and a supplier scorecard
I use a five-step verification process. I share the exact checks I run and the questions I ask suppliers.
Step 1 — Paper check
I ask for business license and export registration. I also ask for tax or export invoices. I verify names and addresses.
Step 2 — Product trace
I ask for product photos, machine lists, and raw material sources. I ask which brands of resin or film they use.
Step 3 — Client references
I ask for three recent clients. I call or email at least one. I ask about lead time, defect rates, and responsiveness.
Step 4 — On-site or video audit
I visit when volume justifies it. If I cannot visit, I hire a local inspector or request a timed live video showing the production line and storage.
Step 5 — Trial order and inspection
I place a small paid trial order. I book a third-party pre-shipment inspection for the trial or for the full order.
Supplier scorecard I use
| Factor | Weight | Pass threshold |
|---|---|---|
| Business verification | 20% | Registered export seller |
| Technical capability | 25% | Production line and machines match claims |
| Quality history | 20% | Low defect rate and test reports |
| Communication | 15% | Fast and technical replies |
| Inspection result | 20% | Pre-shipment checks passed |
I refuse suppliers that fail basic checks. I learned that a friendly sales rep can hide poor production. I avoid that risk by requiring visible proof.
Pit 4: Skipping Contracts and Inspection Before Shipment?
You think a simple chat or email is enough. That thought will cost you. I always use a clear PO and third-party inspection for big orders.
I put specs, sample ID, tolerance, test methods, payment terms, and penalties in the contract. I hire inspection before shipment when the value is high. This step saves me money and time.
%inspection pre-shipment edgebanding QC
Dive deeper: contract elements and inspection checklist I require
I treat the purchase order as the quality gate. I include clear references and actionable remedies. I then use inspection to enforce the contract.
Contract elements I always include
- Exact sample ID and photos attached.
- Material grade, width, thickness, and finish.
- Adhesive type and melting range.
- Acceptance tests and the test method standard.
- Payment terms and inspection holdback.
- Remedies: replacement, refund, or discount for out-of-spec.
Inspection timing and scope
I require a pre-shipment inspection for orders over my threshold. I ask the inspector to check quantity, labeling, packaging, color vs sample, and to run simple glue and visual tests. I ask for photos and a signed report.
Sample clause wording I use
I attach the approved sample as “Reference Sample ID: S-YYYYMMDD-01”. I state that any production that fails more than X% will trigger replacement. I set X based on risk and volume.
Inspection checklist I give to inspectors
| Item | What to check | Accept / Reject |
|---|---|---|
| Quantity | Count and compare with PO | Accept if within tolerance |
| Color | Compare with Reference Sample | Accept if match or within ΔE agreed |
| Adhesion | 90° or T-peel quick test | Accept if meets contract |
| Packaging | Strips wrapped and labeled | Accept if intact |
| Documentation | Test reports and labels | Accept if present and correct |
I use this contract and inspection routine for every critical order. I also keep a small funds holdback until inspection clears. This practice helped me avoid a large recall once.
Conclusion
I avoid these four pits with samples, tests, verification, and clear contracts.
Data sources (names and links)
- IMARC Group — Edge Banding Materials Market Size, 2024 report. https://www.imarcgroup.com/edge-banding-materials-market. (IMARC Group)
- Coherent Market Insights — Edge Banding Materials Market forecast 2025–2032. https://www.coherentmarketinsights.com/industry-reports/edge-banding-materials-market. (coherentmarketinsights.com)
- Ledgeband (industry guide) — Differences between ABS and PVC edge banding. https://ledgeband.com/blogs/edge-bands/understanding-differences-abs-pvc-edge-banding. (LEDGEBAND)
- EdgebandCT — Common problems with edge banding (peeling, bubbling, adhesion). https://edgebandct.com/common-problems-with-cabinet-edge-banding%EF%BC%8Chave-you-encountered-any-of-these/. (edgebandct.com)
- Instron / ASTM references — Peel strength testing (ASTM D903 / ASTM D1876) and testing guidance. https://www.instron.com/en/testing-solutions/astm-standards/astm-d903/. (Instron)