
I see the problem: poor edge bands ruin finished furniture. I show why extrusion matters and how to fix it fast. (PAS — 28 words)
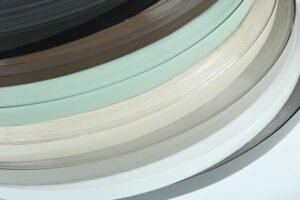
PVC edgeband extrusion melts, shapes, cools, and winds a continuous strip. Control of mix, heat, pressure, and cooling decides strength, color, and flatness — not chance. (50 words)
Now I will walk you step by step. I explain raw materials, machine steps, key settings, and common faults. I keep it practical so you can act or talk to your factory with confidence.
Understanding the Basics of PVC Edgeband Extrusion?
I know this problem: people call all plastic processes “extrusion” but mean different things. I will make it simple. (PAS — 23 words)
Extrusion is a continuous process that melts PVC compound, forces it through a profile die, embosses or prints the face, cools the strip, and rolls it onto reels. Proper control prevents defects and saves rework.
Dive deeper: what exactly happens in each stage of the line and why it matters
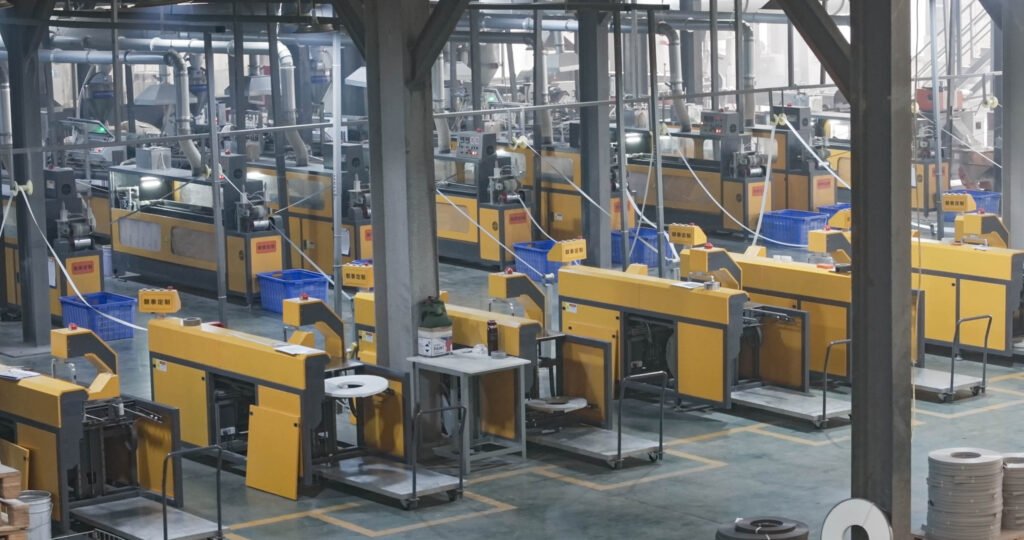
I break the line into clear stages and explain the role of each. I use short, practical points so you can check the factory.
Main stages
- Raw material feeding and compounding. PVC powder and additives are dry-blended into pellets or masterbatch. This ensures consistent melt and color.
- Extruder melting and pumping. A single- or twin-screw extruder heats and homogenizes the mix. The screw design meters flow and builds pressure for the die.
- Die shaping. The die opens the melt into the final width and thickness. Die design and gap set final dimensions.
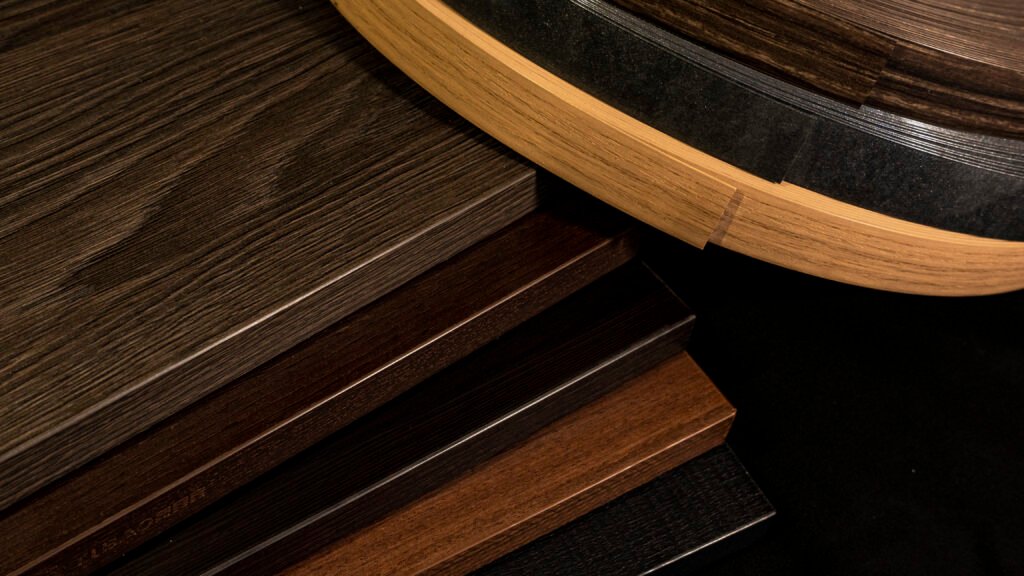
- Surface treatment (printing/embossing). Printing cylinders or embossing rollers apply pattern and texture while the strip is still warm.
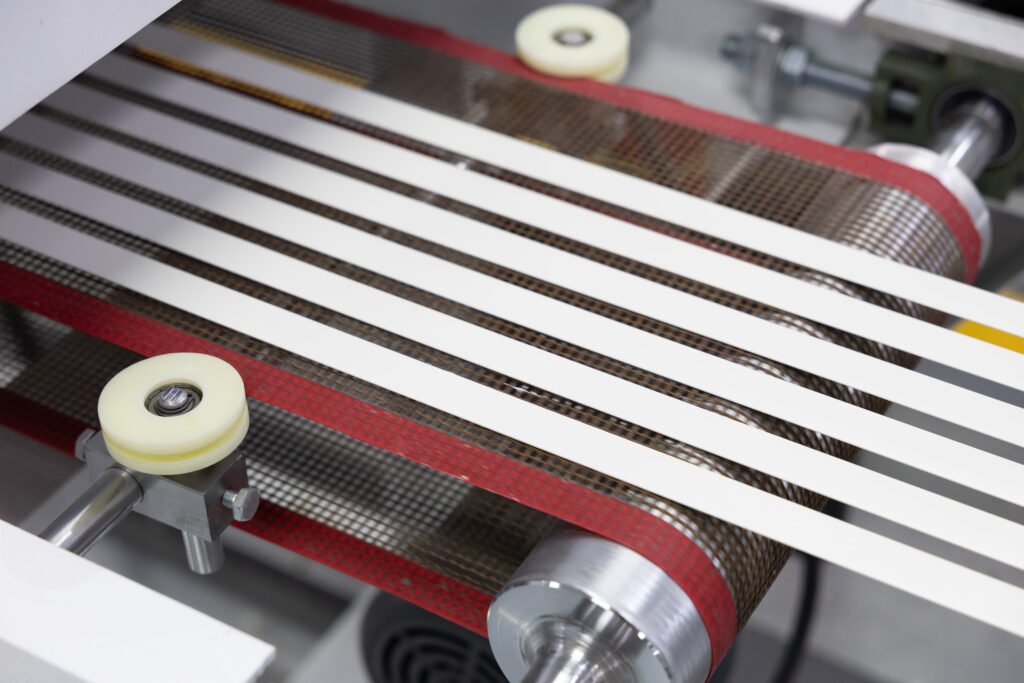
- Cooling and sizing. Water baths or chill rollers set the profile and stop shrinkage. Cooling rate affects flatness.
- Trimming and winding. Edge trimming and winding produce reels ready for laminating or glueing.
Quick reference table — stage vs key goal vs common issue
| Stage | Key goal | Common issue if wrong |
|---|---|---|
| Feeding/Compounding | Uniform blend, correct recipe | Color shift, weak bonds |
| Extruder | Homogeneous melt, stable pressure | Fluctuating output, bubbles |
| Die | Accurate profile | Thickness variation |
| Surface treatment | Desired look/textures | Poor adhesion of print/emboss |
| Cooling | Lock dimensions | Warping, curl |
| Winding | Clean reels | Edge damage, tension marks |
Control each stage. If one step is off, final quality suffers. I use real factory checks: measure melt pressure, watch die gap, check water temp. These checks are simple and effective.
Key Raw Materials Used in PVC Edgeband Production?
You might think PVC is just one powder. It is not. The mix changes performance. That is the problem I often see.
Typical edgeband compounds include PVC resin, fillers (like calcium carbonate), plasticizers, stabilizers (Ca/Zn or other systems), pigments, and processing aids. Each affects melt behavior and final properties.
Dive deeper: common formulations, roles, and how small changes change the result
I describe what each ingredient does, typical ranges, and practical trade-offs. I write plainly so you can discuss formulation with your supplier.
Ingredient roles and typical ranges
- PVC resin (base): 40–70% by weight depending on flexibility needed. This is the backbone.
- Fillers (calcium carbonate): 10–30%. Reduce cost, modify stiffness, affect surface finish. Too much causes rough face or poor embossing.
- Plasticizers: 5–25% for flexible grades. More plasticizer increases flexibility but may reduce heat resistance and cause migration over time.
- Stabilizers (Ca/Zn, others): 1–5%. Prevent thermal degradation during processing and in use. Wrong stabilizer causes discoloration and poor weathering.
- Pigments/UV absorbers: small percent. Critical for color consistency and outdoor resistance.
- Additives (lubricants, impact modifiers): 0.5–5%. Improve surface, reduce die build-up, or raise impact resistance.
How small formula shifts change output
- Increase calcium carbonate to save cost, and the surface may become dull. Embossing detail can be lost.
- Add too much plasticizer and the roll feels soft and may draw-in dust. Heat during extrusion then causes sticking.
- Use an improper stabilizer and you see yellowing or pinholes after short residence time in the extruder.
I recommend that you insist on a tech sheet from suppliers. Check % of filler and stabilizer. Ask for a sample run on your line. Real data beats a promise.
Step-by-Step Breakdown of the PVC Edgeband Extrusion Process?
You want a checklist to watch a production run and spot issues. I have used one in the factory. (PAS — 20 words)
The full run goes: weigh/blend → feed to extruder → melt and homogenize → shape with die → emboss/print → cool and size → trim and wind. I use checkpoints at each stage to keep quality steady.

Dive deeper: practical checklist and tuning tips for each step (with short procedures)
I present a practical checklist you can use during a trial or a full production shift. Each item is simple. I focus on measurable settings.
Pre-run checks (before feeding)
- Confirm recipe and batch weights.
- Verify pellet dryness and no contamination.
- Check screw and barrel temperatures are at start setpoints.
During extrusion — real-time metrics to watch
- Melt pressure: Should be stable. Spikes mean blockages or die issues.
- Extrusion speed (rpm) vs line pull: Match pull speed to extruder output. Mismatch causes stretch or slack and affects thickness.
- Die gap and die temperature: Check daily. Small variations change thickness.
- Surface finish as it exits die: Look for bubbles, streaks, or melt lines.
Cooling and sizing
- Start with recommended water temperature and adjust if strip curls. Too cold too fast can lock internal stresses. Too warm causes slow setting and sag.
Trimming and winding
- Check knife alignment and tension. Incorrect winding causes telescoping or edge damage.
Simple tuning table — problem vs quick action
| Problem | Quick check | Quick action |
|---|---|---|
| Bubbles/pinholes | Moisture? Melt temp too high? | Dry pellets, lower mix temp |
| Color shift | Batch change or pigment feed | Check masterbatch and feeder |
| Thickness variation | Die gap or pull speed | Adjust die or sync speeds |
| Curl/warp | Cooling too fast or unequal | Balance water flow, slow cooling |
I always advise doing short trial runs when shifting formula or color. Log the parameters and keep one good reel as a baseline sample.
How Temperature and Pressure Affect Extrusion Quality?
Temperature and pressure are the two controls that make or break a run. I have seen runs fail because of one wrong zone.
Barrel temp profile, die temp, and melt pressure govern flow, gloss, and dimensional stability. Stable temperature and controlled pressure reduce pinholes, die build-up, and color drift. Monitor both, and tune slowly.
Dive deeper: how to set profiles and what numbers to target
I give practical target ranges and explain effects of changing each parameter. Keep the language basic and the rules actionable.
Temperature profile basics
- Feed zone: lower, to avoid bridging and ensure solids feed. Typical start around 130–160°C depending on formula.
- Compression/metering zones: higher, to melt and homogenize the material. Typical 160–190°C.
- Die: maintain even die temperature to avoid streaks; die may be set slightly higher than metering to ensure flow.
Pressure targets and why they matter
- Melt pressure is a direct sign of flow resistance. Sudden rises point to partial die blockage or contamination. Keep records of normal pressure ranges for your line.
Practical tuning steps
- Increase temperature in small steps (2–5°C). Watch melt pressure and surface.
- If pressure rises with no output change, stop and inspect die. Do not push higher RPM.
- If surface shows streaks or degradation, lower residence time by raising throughput or lowering barrel temp slightly.
- Use PLC alarms for pressure spikes. Modern lines save logs; use them to find trends.
I recommend that you keep a running logbook. Record zone temps, RPM, melt pressure, die temp, and pull speed. Over time you will see what settings give the best reels.
Common Defects in Extrusion and How Manufacturers Prevent Them?
Defects are the main cost. I focus on the common ones and show how to prevent each. (PAS — 19 words)
Typical defects include pinholes/blisters, color variation, thickness variation, die lines, and curling. Prevention relies on recipe control, correct temperatures, clean dies, matched pull speed, and proper cooling.

Dive deeper: root causes, preventive checks, and corrective actions
Here I list common faults, their root causes, and practical fixes. This is the part your production manager needs.
Defect: pinholes / blistering
- Root cause: Moisture in raw material or trapped air in melt, or overheating during mixing.
- Prevent: Dry feedstock, reduce mix temperature, vent the extruder if needed. Use de-gassing screws when necessary.
Defect: color streaks or inconsistency
- Root cause: Poor masterbatch dispersion, pigment feeder drift, or change in filler ratio.
- Prevent: Use consistent masterbatch, check feeder calibration, use inline colorimeters for high-end lines.
Defect: thickness variation / die swell
- Root cause: Die gap, inconsistent pull speed, or pressure fluctuation.
- Prevent: Set die properly, match line pull to extruder output, and log pressure to spot drift.
Defect: surface contamination / die build-up
- Root cause: Low-quality additives or overheating.
- Prevent: Use recommended lubricants, maintain die cleaning schedule, and avoid long residence times.
Defect: curling / warping
- Root cause: Uneven cooling or internal stresses from too-fast cooling.
- Prevent: Balance water flow, use sequential cooling stages, and allow an air gap where needed.
I find many factories reduce defects by doing simple things: consistent compounding, scheduled die cleaning, and a short logbook. Even low-tech checks save a lot of rejects.
Conclusion
I have explained the extrusion line, materials, settings, and fixes. Use checks, log data, and run trials to cut defects and cost. (27 words)
Data sources and links
- JWELL — “How Does a Plastic Edge Banding Extrusion Line Work?” — https://www.jwellmachine.com/how-does-a-plastic-edge-banding-extrusion-line-work/ (jwellmachine.com)
- JWELL GROUP — “PVC edge banding extrusion line production problems and solutions” — https://www.jwell-group.com/blog/PVC-edge-banding-extrusion-line-production-problems-and-solutions/ (jwell-group.com)
- Cantisa — “Technical Datasheet – PVC Edgeband” (pdf) — https://cantisa.es/wp-content/uploads/2017/07/hoja-t%C3%A9cnica-PVC_ingl%C3%A9s-1.pdf (cantisa.es)
- Teknor Apex — “Processing Guide for Extrusion of Semi-Rigid PVC” (pdf) — https://www.teknorapex.com/content/dam/teknorapex/en-us/pdf/processing-guides/Semi_Rigid_PVC_Insulation_Extrusion_Processing_Guide___UPDATED_PDF.pdf (teknorapex.com)
- Uplastech — “Common Defects in Plastic Extrusions” — https://uplastech.com/common-defects-in-plastic-extrusions/ (uplastech.com)